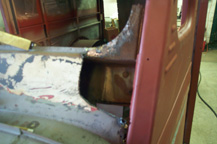
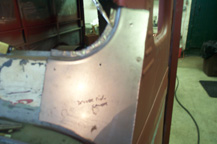
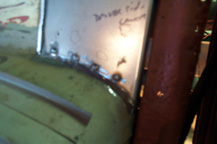
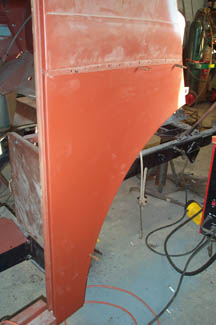
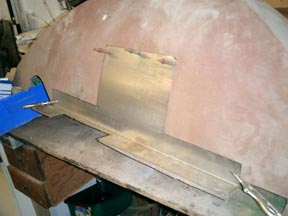
I've been putting off doing this window frame for too long. Of course I have been busy with other things, but finally got around to doing it. This panel rusted from both sides and had to go. I made a new panel using a hammerform. (2) Here I clamped the rough panel over the frame to mark where I need to bend it into the side panel and cut it for the cowling. (3) This shows the right side bent into the drivers side panel and the spot welds holding the new panel to the cowl. This HTP Mig welder is superb. It has the ability to duplicate spot welds. (4) A finished panel, and to think I've been putting this off for about a year. It matched up perfectly. After a little bit of grinding and hammering, it's flat & ready for primer.
A brief description of Hammerforming is on the Metal Working page.
(1)
(2)
(3)
(4)
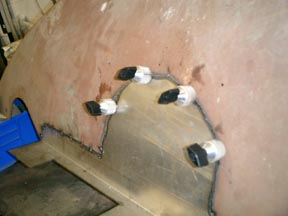
Nov. 18th: After finishing the drivers side I got motivated. Set my alarm for 4:30 A.M. to get up and watch the meteor shower and then get to work. I clamped in the other side and spot welded it into place. The fit is supurb, I impressed myself ( a little bit of head swelling is ok ). As the project stands now all that's left to do on the front is a little grinding and then primer.
New panel clamped in place.
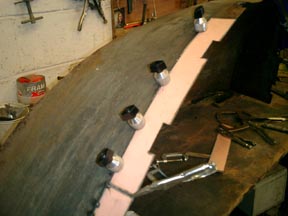
All welded and ready for primer.
Drivers side lower windshield panel replacement.
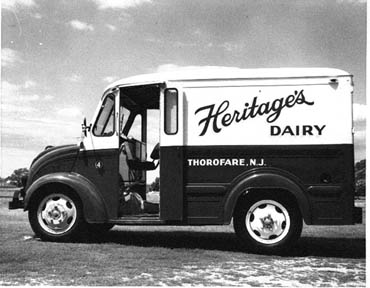
To keep focused, this is what it is "supposed" to look like when completed.
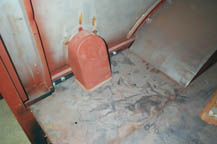
Drivers side rear lower panel
New floor and fuel pipe cover
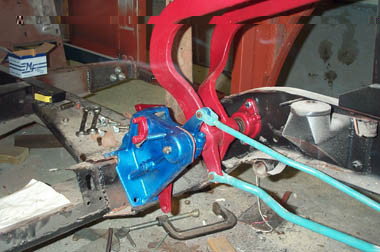
December 8, 2001: Before I finish the inside lower panels, I wanted to install the clutch/brake mechanism. Here it is temporarily installed. The shaft that the pedal arms ride on is rusted badly. I have to take the shaft to a machinest to have a new shaft made and the brass inserts replaced on the pedal arms.
View from the right side fender looking back toward the drivers side,
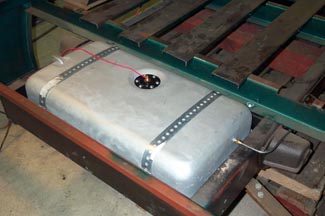
December 16th: The gas tanks from both trucks were in bad shape. So I picked the best one, reconditioned the inside using Eastwoods gas tank kit and had the sending unit repaired. Here it is, installed and ready to go.
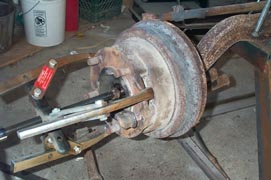
Began work on the front suspension. The rust is horrible. Both drums are stuck. So what I did was pull the outer bearing and attach a large wheel puller, only putting a strain on it. I would have backed off on the shoe adjusters but they are frozen. Then took the torch and heated up the drum really hot. When I thought I had enough heat I used a large prybar and rotated the drum. Once it started moving I increased the pressure on the puller and worked the drum off. I also tapped on the drum using a hard plastic mallet. (didn't want to hit it with a hammer as it may have cracked) The reason for pulling the outer bearing is so that I could angle the drum as I pulled it off to keep the shoes from catching on any lip that might be on the drum.
December 22nd:
I bought replacement brake cylinders and was surprised that they are available. Raybestos # WC8852 and WC8853.
January 11th:
All four leaf springs are rusted and some leafs are broken. The shackles are also worn badly. I took the whole lot to Chester Spring works. They made new springs and pressed new bronze bushings in the shackles. They also made new U bolts. Aren't they pretty?
The new leaf springs
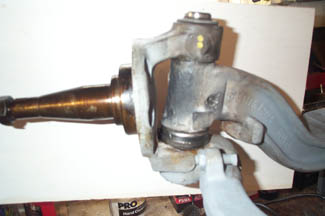
Here's the front axle, tie rod & brake parts after sandblasting, ready for paint.
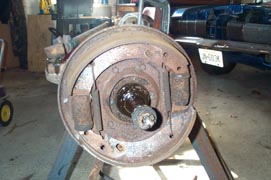
Front brake drum
This picture is of the brake shoe adjusters on the front axle. They were rusted solid & had to be cut off. I welded threaded rod onto the shaft to replace what I cut off. After I install them I'll tighten down the nut and drill a hole through the nut and bolt and put in a roll pin.
Chester Spring Works also installed new king pins. Can you believe they had new ones on the shelf?
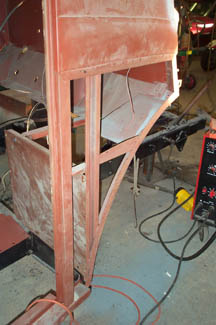
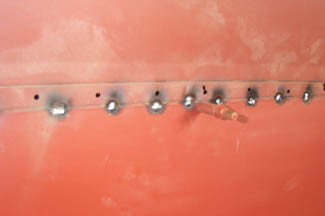
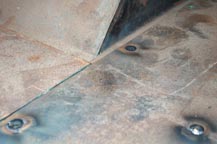
Finally, this is the last panel to be replaced. I made the replacement some time ago. The previous panel was just pop-riveted on so I have to weld those holes closed as well. The picture below is a close up of the spot welds I run across the seam before final welding. The secret here to a great weld is to take your time. Don't let the metal heat up or it will buckle & warp making for a really poor job.
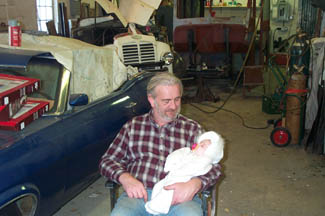
Of course here's the most important time of the day. Hannah stopped by so I get to see Sofia.
January 27th:
March 10th:
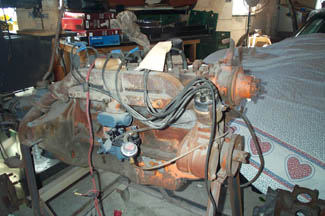
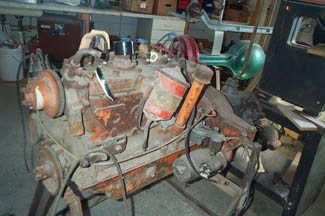
This is the engine that I'm using for the restoration. It's a Hercules QXLD3. A flathead 6 cylinder. I built this engine stand to hold it . Note the rebuilt carbeurator and starter motor. I have rebuilt the fuel pump but the fuel pressure tension spring is bad so I need to replace the spring or use a fuel pressure regulator. These carbeurators can't take much pressure.
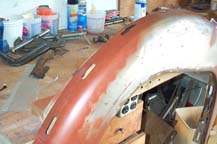
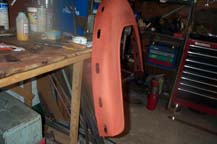
June 2002: The fenders are really rusted bad. Sections are missing. I have 20 ga. sheet metal so I created a cardboard pattern of the replacement section and cut out the patch from the steel. Welding in goes fast. Just needed to grind off the excess and use a little filler. The fenders look brand new.
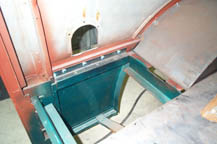
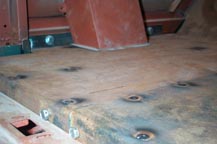
1/11/03 I made this floor and wheel wells some time ago but did not want to install it until the rear was in. Well, here it is, all welded in place. (18 Gauge steel) then treated it with a metal wash to get rid of any surface rust.
1/25/03 Reconstructing the inner fender well:
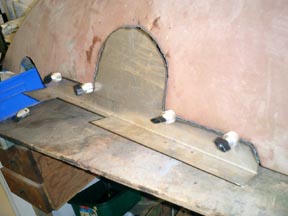
This is the drivers side inner fender well. The rust was too extensive but not so bad that I should remake the entire piece. 1) I have formed a replacement panel (oversized) and clamped it in place. 2) I then use a plamsa cutter to cut the new form and the fender at the same time, allowing for a perfect fit. 3) Using panel aligning tools I can then tack weld the new panel in place. 4) This is the other side of the fender well that bolts up to the fender. About one inch was rusted away here so I replaced it. (note the pink metal is 20 ga. store shelving)
1)
2)
3)
4)
This is a video of the rear. If it does not play for you, please let me know.
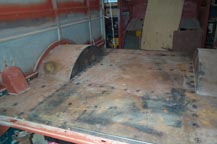
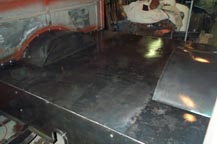
Installed the rear. Looks great. (except for all that dust)
This Page covers work from November 2001 to January 2003